inSITE: Add / Manage Profile
The Add / Manage Profiles functionality is available to the Broker Manager and Broker User (Maker) user roles.
To add / manage profiles:
- Prior to adding or managing profiles, you must select one Disclosure Document within the Document Search Results list. After selecting a document, the Add/Manage Profile(s) button becomes available.
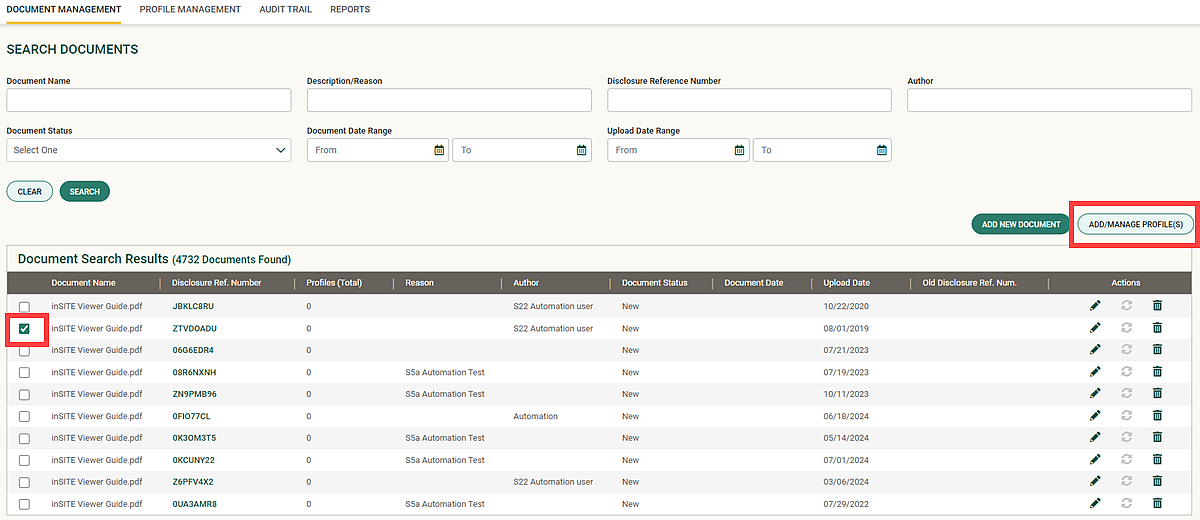
- Click Add/Manage Profile(s) to open a popup window with two available options or tabs: Add New Profile that allows to add enrichment criteria and Profile List that provides profiles available for your document with ability to submit profile, deactivate profile, and delete profile.
Add New Profile
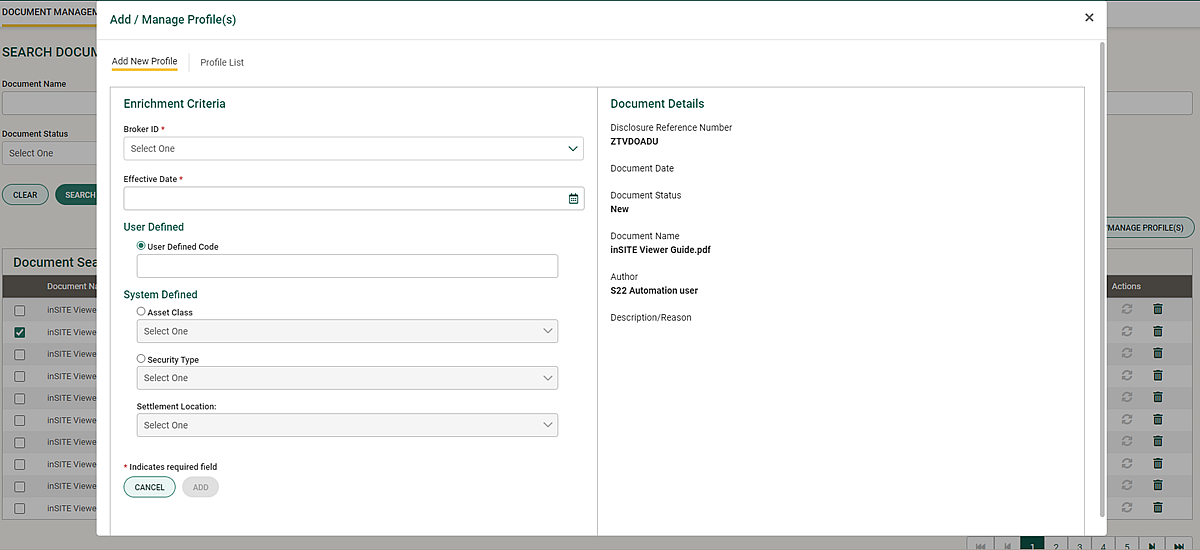
Add New Profile functionality allows the addition of a new profile to the current document. When you initiate the Add New Profile popup window, the Add New Profile dialog options appear in the first tab to add a new profile.
|
| Note |
| If you do not need a new profile, click the second tab, Profile List, to maintain the existing profiles. |
Use the fields on the first tab, Add New Profile(s), to enter as many enrichment records in the Add/ Manage Profiles popup window as required to define the usage of the selected Disclosure Document by Trade. Define the field data in one of the columns in Table 1 to define the usage of the of the selected Disclosure Document by Trade.
| Note |
| You must select either System Defined Code of Asset Class or Security Typeand Settlement Location or enter User Defined Code. |
| Option 1 | Option 2 |
|---|---|
|
|
Table 2 describes the fields on the Add / Manage Profiles window.
| Fields and Buttons | Description |
|---|---|
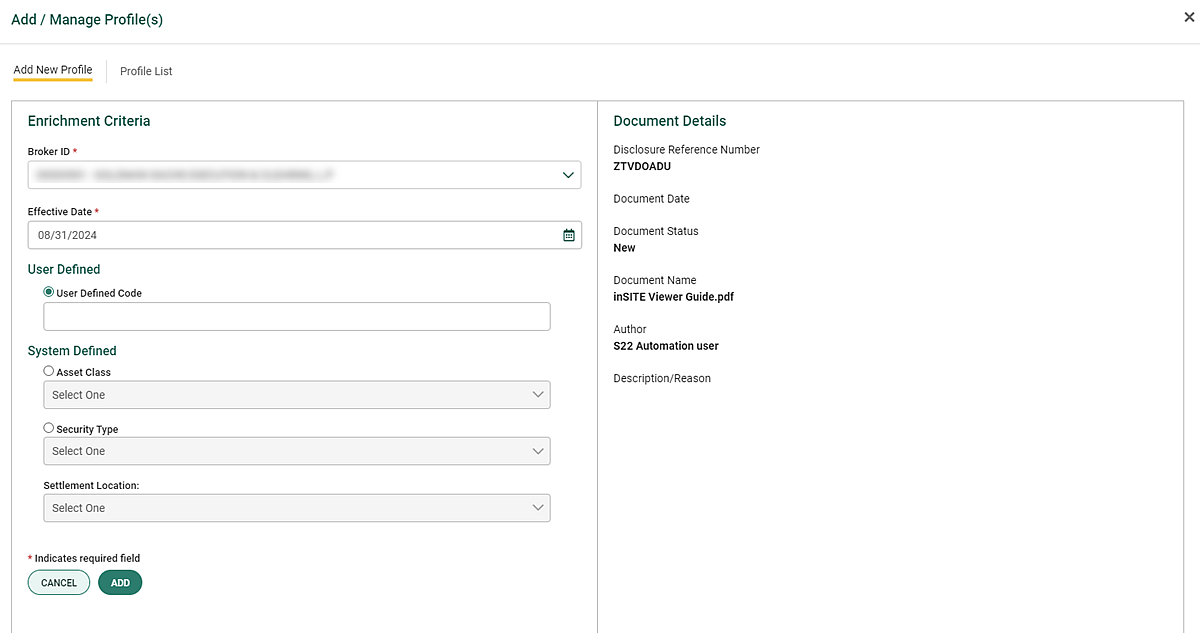
| Broker Id | Select a broker ID from the drop-down list. To apply the criteria across all your broker ID numbers associated or linked to your sign-on ID, select All. |
| Effective Date | Enter the effective date. This is the first day or date that a trade can be enriched with a confirmation disclosure. The effective date must be greater than today. |
| User Defined Code | Select to define a unique disclosure code number for the profile. Then, enter the disclosure code. The code can only contain alpha characters (A through Z) and numbers (0 through 9). Maximum length is 16 characters. It is not case sensitive field. For example, the CTM service treats “ABC,” “abc,” and “aBc” as the same value. |
| Document Details | The fields in this section of the page display the details for the document selected on the Profile Management page. Use the Document Management function edit this information. |
| System Defined Codes: | |
| Asset Class |
You can select All asset classes or a specific asset class from the drop-down list. See TradeSuite ID Asset Classes and Security Types for a list of TradeSuite ID security types contained in each asset class, |
| Security Type |
Select a specific security type from the drop-down list. See TradeSuite ID Asset Classes and Security Types for a list of TradeSuite ID security types contained in each asset class, |
| Settlement Location |
Select a specific settlement location from the drop-down list. The most commonly-used location codes in the TradeSuite ID service are:
CTM Settlement Location are MIC codes, as described in the MIC Codes section of the CTM Technical Resources. |
Profile List
Profile List functionality allows to activate, deactivate, and delete profiles.
Click the icons to expand, collapse, and print the content on this page.
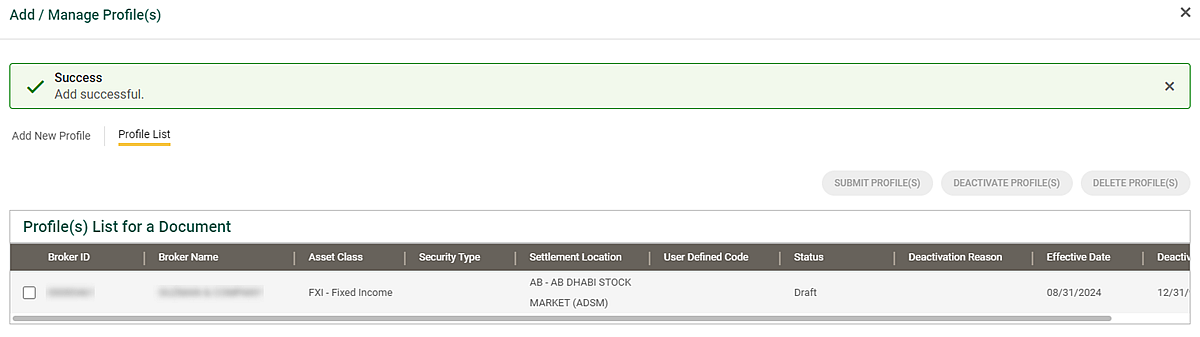
- After defining field data, click the Add button.
- If the defined data is a duplicate, error will be displayed.

- Otherwise, the new profile is added to the list and displayed on the Profile List tab.
- If necessary, click the Add New Profile tab to repeat the process for any other new profiles.
After you have added all necessary profiles, the Broker Manager User must Activate (or Delete) the new profiles that have yet to be activated. The Broker Maker cannot activate new profiles; activating new profiles is limited to users with the Broker Maker function or capability. For more information, see inSITE: Activate Profile.
|
Notes |
|
- Organizations using Maker/Checker capabilities have additional required steps when submitting profiles. After finishing profile updates, the Maker must submit the updated profiles in Draft Rejected, Draft Deactivation, and Submitted for Draft Deactivation status to Submitted for Activation Approval or Submitted for Deactivation Approval for the Checker to review and approve. The Maker uses the Activate Profile(s) button to submit profiles for the Checker to review and approve. The Checker cannot approve a profile until it has been submitted for approval. After a profile has been submitted for approval, all Makers and Checkers with access to the broker IDs in the affected profiles receive and email notification that there are profiles required approval.
- Profiles with a Draft status required activation before they are available for CTM or TradeSuite ID enrichment.