Manage Views and Tabs
You can create your own customized views of trades in the UI. You can create one user-defined view under the Trade Exceptions and Match Agreed sections on the left side of the UI.
- Customized views appear on the left navigational panel. A single customized view can be created under the Trade Exceptions or Match Agreed view.
- Each customized view can have a maximum of ten tabs. The tabs allow you to create modified versions of the customized view. For example, you can set up one tab your US domestic trades with exceptions, while another tab shows your counterparty alleged trades.
To create a user-defined view:
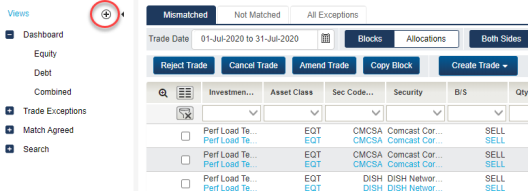
- Click
 Create Customized View next to the Views label at the top of the left panel shown below.
|
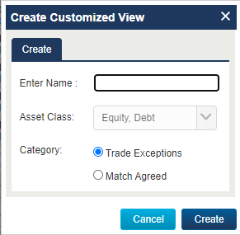
The Create Customized View dialog box appears, shown below.
|
- Enter and select values for the following:
- Type a name for the view in the Enter Name field.
- By default, all views include both equity and debt asset classes.
- Select the category of trades in which you want the view to appear from the Category radio buttons, Trade Exceptions or Match Agreed.
- Click Create.
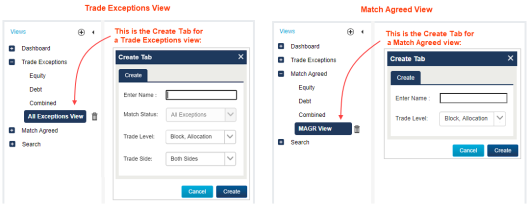
Depending on which category you chose in Step 2, the Create Tab appears, shown below.
|
Use the Create Tab dialog box shown in the last step to add up to 10 tabs for each new view.
- Type a name for the tab in the Enter Name field.
- Make your selections for the remaining fields on your new tab as follows:
| Trade Exceptions View | Match Agreed View |
|---|---|
|
By default the Match Status field includes All Exceptions. Select a Component as follows:
Then, select the Trade Side as follows:
|
Select the Component as follows:
|
- After making your selections in the Create Tab dialog box, click Create.
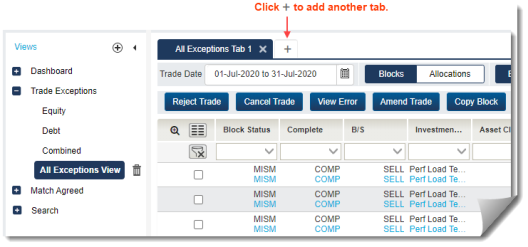
The figure below shows an example of a new tab for the new All Exceptions View.
|
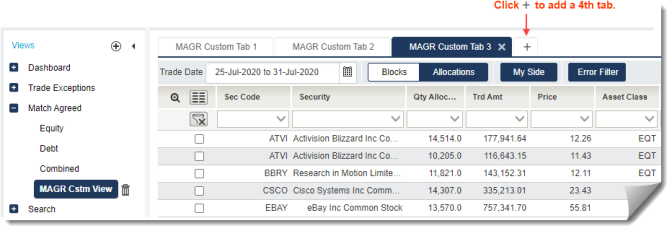
The figure below shows an example of a new tab for the new MAGR Cstm View.
|
Note the following:
- You can apply filters on the fields in your view similar to how you filter the other views.
- All functional buttons are available for each tab based on the role or roles to which you are subscribed.
- You cannot rename views and tabs after saving them.
- Click
 Save Preferences to save your view and tab settings for future use.
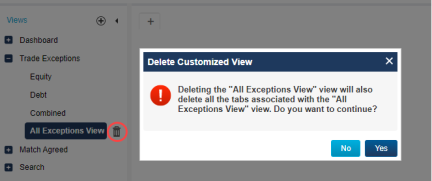
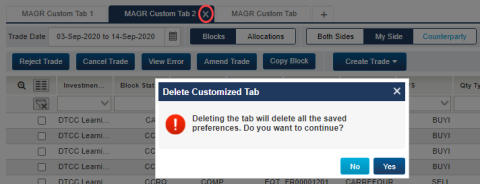
When you delete a customized tab, the UI also deletes all saved preferences. And, when you delete a customized view, the UI deletes all of the tabs associated with the view.
To delete a customized tab, click the X next to the tab label that you want to delete. The UI prompts you to confirm the deletion, shown below.
|
|
To delete a customized view, click ![]() Delete Customized View next to the view that you want to delete. The UI prompts you to confirm the deletion, shown below.
Delete Customized View next to the view that you want to delete. The UI prompts you to confirm the deletion, shown below.
|
|